This is the the 10th blog post in the series about Azure Arc enabled Data Services.
The initial post can be found at Azure Arc for Data Services, part 1 – Intro and the whole collection can be found at Azure Arc enabled Data Services.
In the previous post Azure Arc for Data Services, part 9 – Basic of the SQL Managed Instance we have seen how to create and how to remove SQL Managed Instance on Azure Arc Services and in this post we shall take a look at the configuration of the SQL Managed Instance.
Before anything else, I have already created a [sql20] SQL MI on my Azure Arc enable Data Service as per previous blog post.
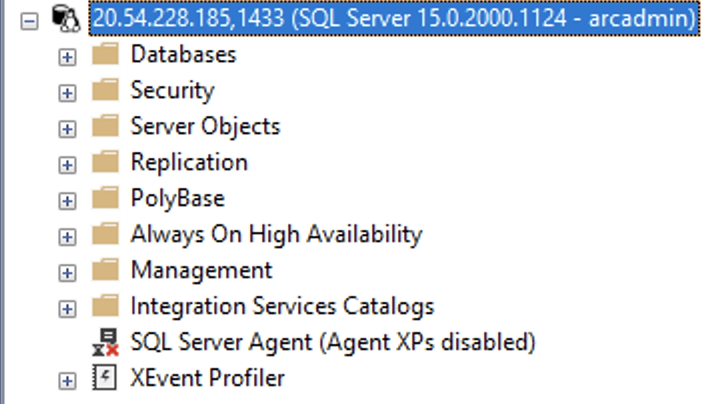 Once we connect to the instance, the first thing to notice is that the SQL Agent is inexplicably stopped. I find this decision while understandable (it optimizes the resources usage), but quite disastrous in the terms of the usability. SQL Managed Instance on Azure has the SQL Agent and I find that choosing the SQL Managed Instance is a decision to have the usual environment of multiple databases and automated agent – which is sadly missing by default. Giving the complexity of the moment to reconfigure the SQL MI, it will prevent a number of people of finding out that it is actually possible to have it working – people will simply assume that if the GUI does not allow you to start it, it must be impossible to do so.
Advanced Creation Parameters
Creation of the new SQL Managed Instance has a number of nuances that can be controlled well with the creation command, including such parameters as:
–cores-limit (-cl) allowing to specify the number of cores that will be assigned to a SQL Managed Instance by default
–cores-request (-cr) allowing to define the cores request in GB
–memory-limit (-ml) defining the memory limit of the capacity of the managed instance
–memory-request (-mr) allowing to define the request for the capacity of the managed instance in GB
–no-external-endpoint a very cool option allowing us not to specify an external endpoint. This is useful for the cases where you want to isolate your application as much as possible from the external access and just want to work within your Kubernetes cluster.
–path as usually the path to our custom json file
–replicas allowing us to create high availability solutions with Availability Groups, if specified more than 1 instance. Notice that currently it seems that this number can not be changed later.
–storage-class-backups (-scb) allowing us to select a specific Kubernetes storage class for our backups. Think if you are using some kind of tape or something :)
–storage-class-data (-scd) allowing to specify a specific Kubernetes storage class for our data
–storage-class-data-logs (-scdl) allowing to specify a specific Kubernetes storage class for our logs
–storage-class-logs (-scl) allowing to specify a specific Kubernetes storage class for logs (/var/log).
–volume-size-backups (-vsb) defines the size for the backup volume
–volume-size-data (-vsd) defines the size for the data volume
–volume-size-data-logs (-vsdl) defines the size for the data logs volume
–volume-size-logs (-vsl) defines the size for the logs volume
–dev allowing to define if the instance is for the development purposes and thus won’t be billed for.
Note: all volume-size parameters can have their values specified either in Ki (kilobytes),in Mi (megabytes), or in Gi (gigabytes).
If we want to create new SQL Managed Instance with the 128GB of RAM, 32 CPU Cores, while using Premium Storage for the Logs and Azure Files for the backups, setting all values for the Data and Logs at 100GB, and 1TB for the Backups, this can be done with the help of the following command:
azdata arc sql mi create -n supersql -cl 32 -ml 128 -scb azure file -scd managed-premium -scdl managed-premium -vsb 1024Gi -vsd 102Gi -vsdl 102Gi
Custom Configuration
A good place to start is to create a new configuration JSON file, by simply extracting the current configuration for a simple instance with the help of the following command into sqlmi.json file:
azdata arc sql mi show -n sql20 -o json > sqlmi.json
The next step would be to edit your configuration (use vi :) or your other favorite editor for that purpose), changing and/or adding/removing the respective properties and then reapplying the changes to our instance with the command AZDATA ARC SQL MI EDIT and pointing the path to our JSON file:
azdata arc sql mi edit --path ./sqlmi.json -n sql20
Warning: there are a number of scenarios that are not functioning right now, such as changing a single instance to multiple replicas and Availability Groups will fail (how to detect this will be a topic of a separate blog post).
Scaling SQL MI
As a matter of a fact, we don’t have to go through “gruelling” for some people, configuration extraction and editing.
We can do a number of changes with the help of the AZDATA CLI itself.
One of such operations is the scaling, where we can specify the number of CPU cores and the amount of memory per instance.
We can also specify right now 4 original “create” command parameters that will allow us to change the virtual resources of our pods:
–cores-limit (-cl) allowing to specify the number of cores that will be assigned to a SQL Managed Instance by default
–cores-request (-cr) allowing to define the cores request in GB
–memory-limit (-ml) defining the memory limit of the capacity of the managed instance
–memory-request (-mr) allowing to define the request for the capacity of the managed instance in GB
And so we could easily scale down our instance to 1 CPU core and 2 GB of Ram (the absolute minimum for SQL MI) with the following command:
azdata arc sql mi edit -n sql20 -cl 1 -ml 2Gi
![]()
Notice that at least for now, the change won’t be instant and expect the full amount of time it takes to be recreated.
Configuring SQL MI
The configuration of the SQL Server on Linux is well-known and documented that requires you easy using the mssql-conf utility or by creating the configuration in a simple text file by yourself.
The requirement for the user configuration is that it should be stored in mssql-custom.conf file in the /var/opt/mssql/ location.
Before advancing with any configuration operation, one needs to determine a couple of elements before diving into the configuration changes.
Find out the name of your Pod & Container
To be able to execute granular operations against the SQL Managed Instances, we shall need to be able to invoke operations directly against the specific container in a specific pod, which means that you desperately need to know their respective names, and for that purpose let’s list the available pods with the following command:
Kubectl get pods -n arc
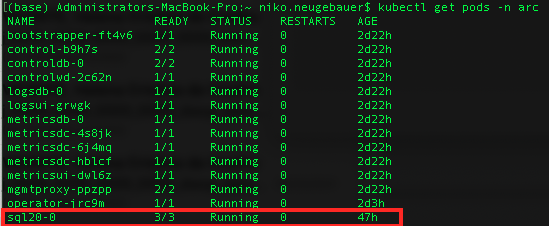
As you can from the picture above, we have the pod that has the format [name_of_our_sqlmi]-[number], where the [number] is a number that starts from 0, as in the case of High Availability solutions such as Availability Groups for SQL MI or Hyperscale PostgreSQL we can have multiple instances of the same pod, thus getting a number makes total sense.
Now using JsonPath we can scan for the name of the containers within our pod [sql20-0]:
kubectl get pods sql20-0 -o jsonpath='{.spec.containers[*].name}' -n arc
and here we go, we have 3 containers within our pod:
– fluentbit: our good old forwarder
– collectd (base): our good old metrics collector
– arc-sqlmi <- the one we are looking for.
![]()
This means that once we start invoking any command against our SQL Managed Instance, the way to do it is to use the pod [sql20-0] and the container [arc-sqlmi].
The default configuration can be viewed in the folder /var/opt/mssql/ in the mssql.conf file.
Let’s connect to our container in our pod and start Bash command prompt (by specifying the parameters -it [pod_name] -c [container_name]):
kubectl exec -it sql20-0 -c arc-sqlmi -n arc -- /bin/bash
Now, let’s change into our destination folder
cd /var/opt/mssql/
and let’s look into our default configuration:
cat mssql.conf
![]()
As you can see that the ONLY default setting is just to disable the telemetry … which comparing to the Azure SQL MI is quite disappointing.
Let’s exit the the environment in order to work on our configuration by executing the exit command:
exit
Moving forward let’s fire away a text file and start configuring a couple of things, such as:
– enabling the SQLAgent
– enabling 3 trace flags
– ensuring that the default locations are all pointing where we want them to be
[sqlagent]
enabled=true

[traceflag]
traceflag0 = 1499
traceflag1 = 8086
traceflag2 = 4199

[filelocation]
defaultbackupdir = /var/opt/mssql/data/
defaultdatadir = /var/opt/mssql/data/
defaultdumpdir = /var/opt/mssql/data/
defaultlogdir = /var/opt/mssql/data/
Let’s save this file as the mssql-custom.conf in a local folder on our computer/server.
Now we are ready to copy the file into our container (arc-sqlmi) in the respective pod (sql20-0):
kubectl cp mssql-custom.conf sql20-0:/var/opt/mssql/mssql-custom.conf -c arc-sqlmi -n arc
Next step we need to reenter into the container and force the SQL Server restart, which is required for the new configuration to take place.
Once again, we start the bash prompt and force the restart with the “supervisortctl restart mysql-server” command:
kubectl exec -it sql20-0  -c arc-sqlmi -n arc -- /bin/bash
supervisorctl restart mssql-server
exit

As the alternative, you can force the pod deletion with the kubectl delete pod -sql20-0 -n arc command, but I find it to be an overkill.
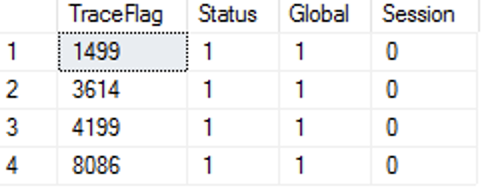
After reconnecting or refreshing the connection to SQL Server, we can enjoy the SQL Server Agent being enabled as you can see on the picture below:

 This is how a SQL Managed Instance is expected to look when we are connecting to it for the first time. This naturally gives an opportunity for the specific managed services provider (internal or external) to customize according to the customer needs, but I personally prefer to have the most common option by default.
In the mean time you can also see the output of the of the DBCC TRACESTATUS command, that will show you besides our 3 custom Trace Flags, the Trace Flag 3614, which is enabled by default with every new installation of Azure SQL Managed Instance.
With the help of this configuration file, you can customize the way you want your SQL MI to be, with the respective folders and functionalities. Notice that the good old Linux configuration for Availability Groups (hadr.hadrenabled) has proved to me to be doing the opposite of expected – thew whole custom configuration file will be ignored, and so I seriously advise to ignore it. We shall see in the next blog post how to get Availability Groups working on SQL Managed Instance and it is 10.000 times easier than one might imagine.
SQL Managed Instance Configurations
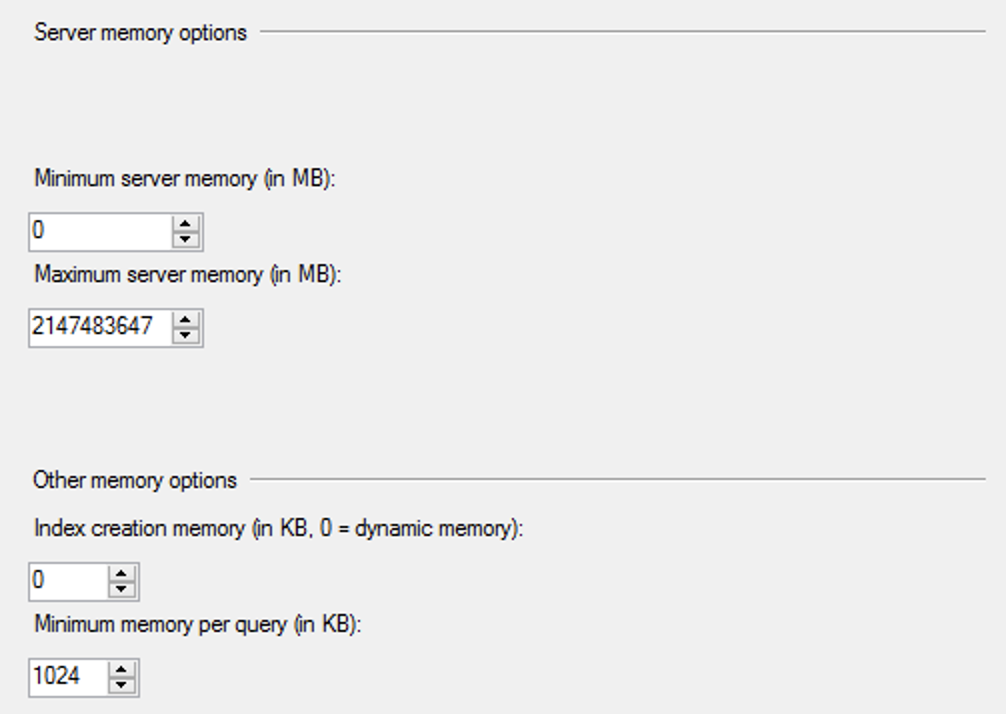
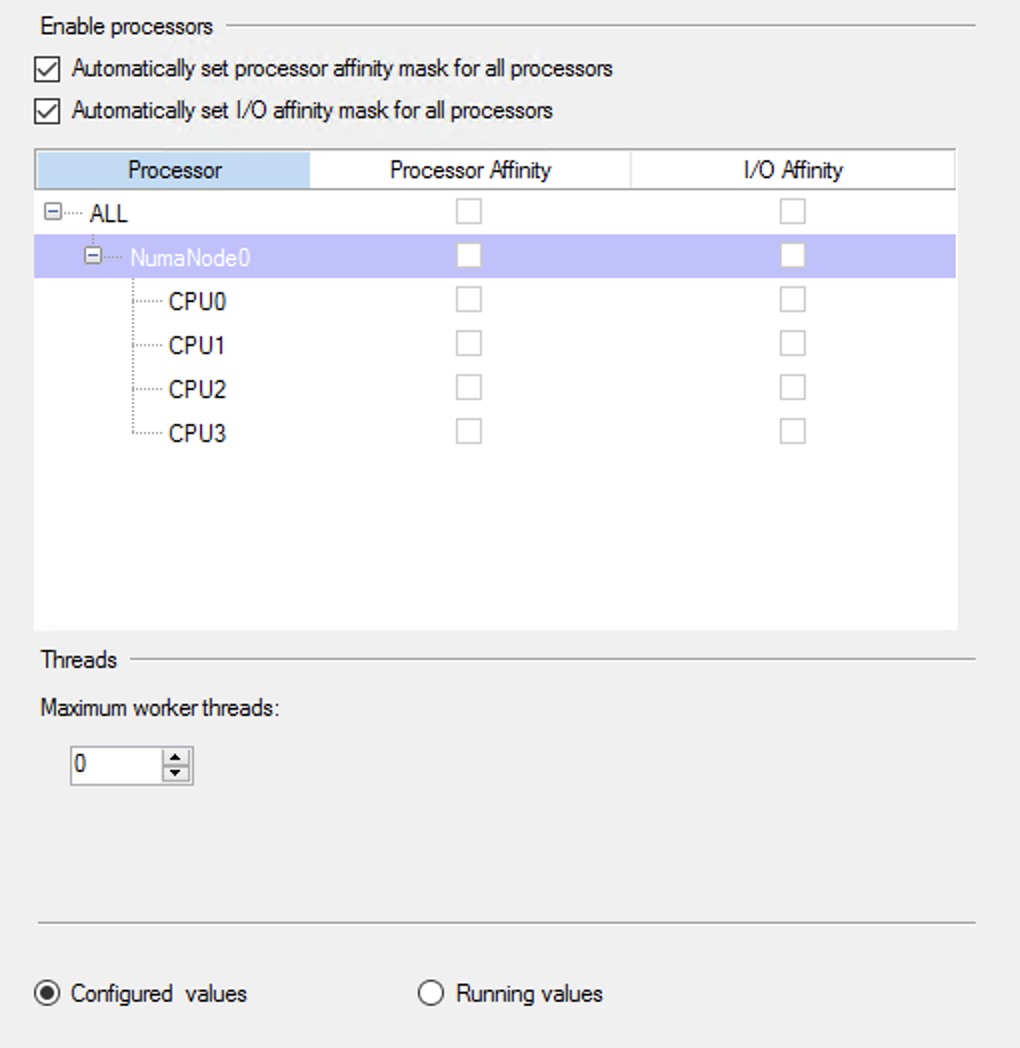 Looking at the actual SQL Managed Instance Configurations one might just purely wonder how much of the Azure SQL MI is in the Azure Arc enabled Data Services SQL MI … The options presented here are pretty much the default ones – and some of them have been been defaults for the last 20+ years. It is a good sign for the scaling options, because if we are increasing the amount of memory, we definitely need to do adjustments on the SQL Server level (if we have changed the defaults) and the same will apply for the CPU settings, but some of the options just scream to be adjusted and if you are working with a high-performance environment, leaving them by default will result in paying very dearly.
 I would even add that I see SQL Managed Instance as a pioneer in pushing some of the necessary default changes that would be interesting to see adjusted to the real world, with the MAXDOP being moving away from 0, Cost Threshold for Parallelism rising above those 5 “insert here your own custom name”, Optimize for Ad-Hoc workloads being active by default, and so on.
This is how easy (or not so much) is to configure your SQL Managed Instance right now and I hope that this will start improving after the GA, because the entry bar is pretty high for a lot of DBAs, and will be a serious killer for the infrastructure admins, potentially giving SQL Managed Instance a rather bad name.
to be continued with Azure Arc enabled Data Services, part 11 – SQL Managed Instance Availability Group
Excellent and useful post as always!!
Hm. Adding custom trace flags 1499 and 8086 to Azure Manage Instance. I’m not very familiar with those – anywhere you can point regarding their behavior?
Hehe :)