Continuing the topic of the Backups to Azure Blob Storage that I have kind of kicked off with the post Striping Backups to Azure Blob Storage, I want to touch on the important aspect of “keeping it clean” – thus deleting the old backups.
On the regular Windows Server this is a rather easy task, and if you are using a standard maintenance solution, such as Ola Hallengren’s Maintenance Solution or any other one. You can also use the regular SSMS maintenance (*cough* for whatever reason that is unknown to me, that you might wish to *cough*), or you can easily set up a regular Windows Scheduler with Command Line Batch or Powershell or whatever tool/script/language you like.
The situation is quite different with the Backup To URL functionality, the one that is available since more than 6 years (and the good old SQL Server 2012 has even got a support for it in a certain Cumulative Update – SQL Server 2012 Service Pack 1 CU 2, to be more prices)
I am not pretending that this is a complete list or truly exhaustive one, but these are the options that I have seen around:
– SQL Server Agent
– Elastic Database Jobs
– Azure Automation Runbooks
– Logic Apps
– Azure Blob Storage Lifecycle Management
Each one of them has its advantages or disadvantages and let’s dive into each one of them.
SQL Server Agent
You can do the cleanup of the old Backups at the Azure Blob Storage by using the same SQL Server Agent that you must be using when doing the backups.
The problem with this method
The exact script is a question of optimisation/requirements/taste and I won’t share here one, but instead point you to what Pieter Vanhove has published the script for this purpose many years ago, and which even with the time passed (6 years) it is still as valid as it was at the moment of his writing.
Scheduling it as an extra step after the execution of the Backups is one possibility, with another one creating an additional maintenance job that will integrate all cleanup of the old backup information (msdb), jobs history, etc.
The risky part of this method that uses the open script (in the case of Pieter Vanhove’s script it is Powershell) – is that you will have to store the primary key for the access to the Storage Account (and not even a container of subfolder) in the plain text. This will give the anyone viewing the code (attackers) a possibility to do whatever they want to with your Storage Account – starting with storing there information and going to reading it (your valuable backups) or even simply removing them. No extra SQL Server permission will be required, especially if you are putting the script on the disk drive (a needed step if you are using AzureRM with the old Powershell & Windows Server versions).
Elastic Database Jobs
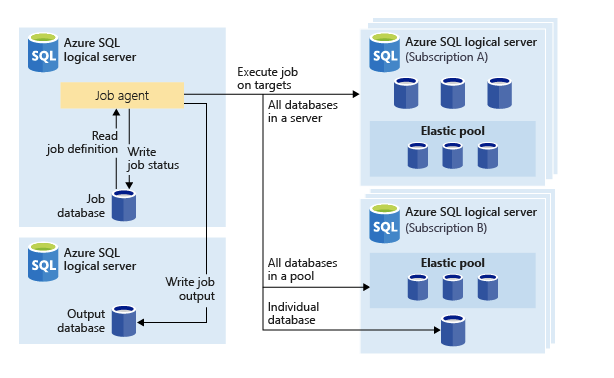 At the moment of this blogpost writing the Elastic Database Jobs are still in preview and their primary target is to serve Azure SQL Database, which do not posses the SQL Agent (such as single instance, and definitely not the Managed Instance). For this purpose you will have to set up a database that will hold all the objects for the job to be run. Adding this all complexity, in order to get a Powershell job to run – makes no sense at all, but if you are already familiar with the Elastic Database Jobs and trying to consolidate already existing jobs into it – you can advance with this path.
I won’t even go into the details of doing that, underlying the name of Elastic DATABASE Jobs.
Azure Automation Runbooks
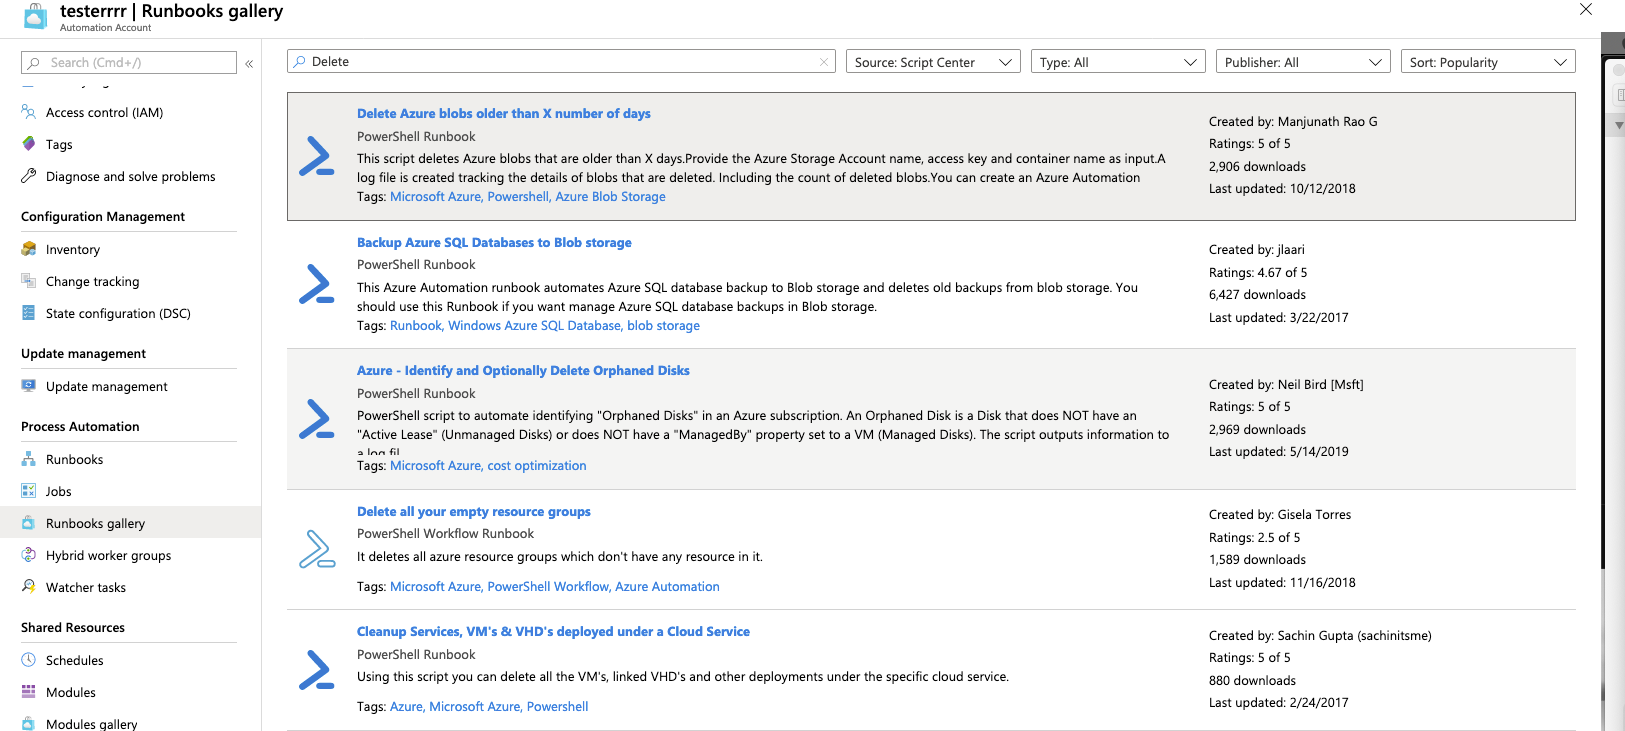 Azure Automation is the oldest “kid” on the block between all presented options and it will allow you to run any of the standard Powershell or Python 2 scripts, plus the Graphical Interface based ones (ouch :)). The nice thing about it is that you can pick up some great scripts that might help you to tackle a specific problem and in a matter of minutes – you are ready to go.
Just be careful and check out every single detail and line of code that you are intending to put into production.
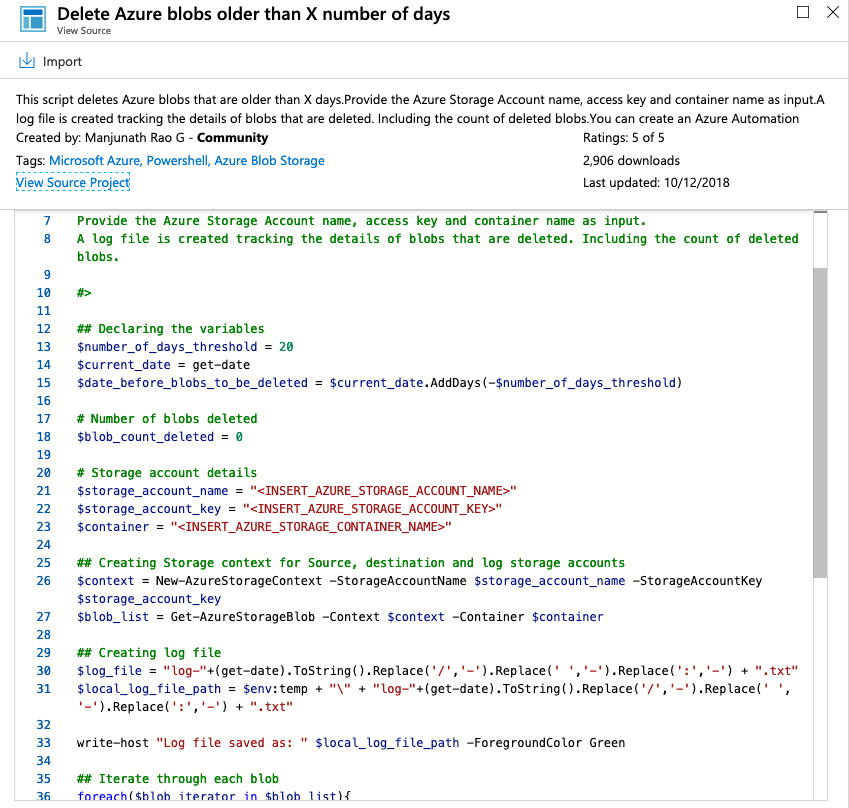 Just like in the example on the right, after picking the “Delete-Azure-blobs-older-than-X-number-of-days” script, after defining the values for the variables allowing them to connect to your Azure Blob Storage and defining the number of days after which that the data should be deleted – you will be pretty much ready to go. All you will need to do additionally is to define the name for the import of the script, put some description (or leave the default one), click on the publish button and voilá – you are almost ready to go.
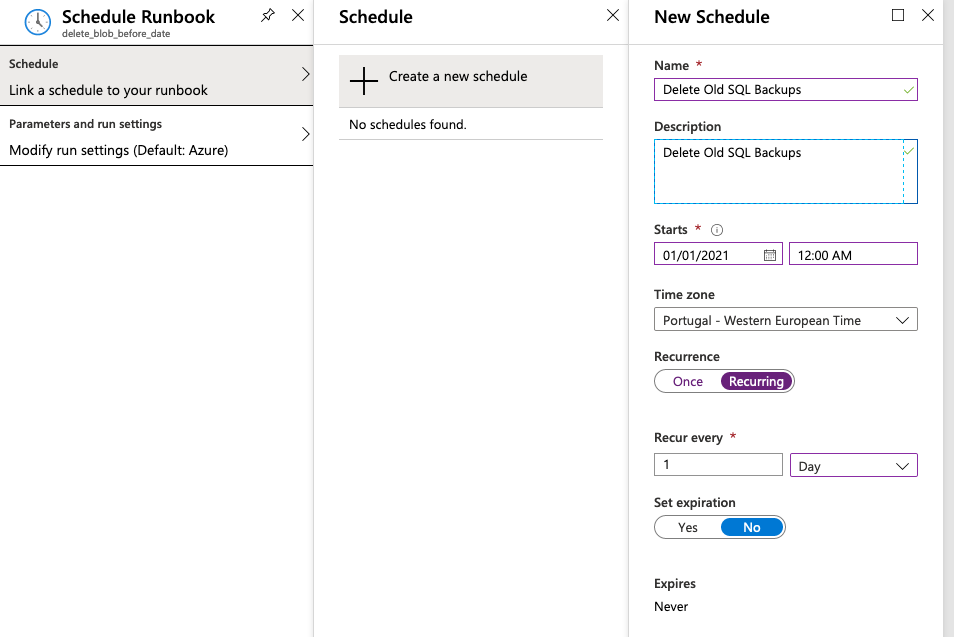 You just need to create a new schedule, define the start point, the recurring frequency (I defined here daily), and define if the schedule should have an expiration date (heh, no). Nothing extraordinary for a SQL Server DBA that is used to configure this for years in the regular SQL Server Agent. For the advanced people, you can naturally script it out by using Azure CLI or Powershell – there are enough articles around on how to do it.
For number of years this was the preferred way of dealing with the Backup Cleanup and I think this is a really accessible way.
The problem here the similar as with the first 2 options – unless you go a more complicated path, you will finish up storing your credentials in the clear text. It is not as bad as the original SQL Agent & Azure Elastic Database Jobs, since you can define parameters and credentials, but I really do not want to deal with those – I just want to remove the old backup files. :)
I think that this option while viable but starts to become really obsolete, especially given the appearance of the Azure Logic Apps & Azure Blob Storage Lifecycle Management.
Logic Apps
Azure Logic Apps (SaaS offering) gives you a pretty much preconfigured application that will do almost everything by default.
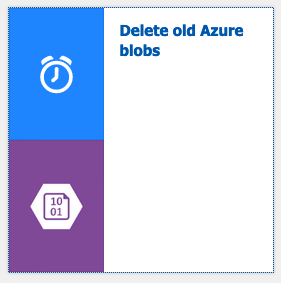 All you need is after creation a Logic App to go to the template gallery in the Designer and choose the right template. The template for deleting old Azure Blobs is one of the most popular ones apparently and you won’t have to scroll a lot down to find it.
 After clicking on it you will see a similar picture as here asking you to confirm the selection of the template to carry on.
That’s about it – all you need to do now is to configure the details, such as connections to the Blob Storage, the affected path of container and folders, Recurrence of the Logic App execution and the desired number of days before the deletion.
Voilá!
 Let’s start the configuration with the needed step of pointing to the right Azure Blob Storage Account
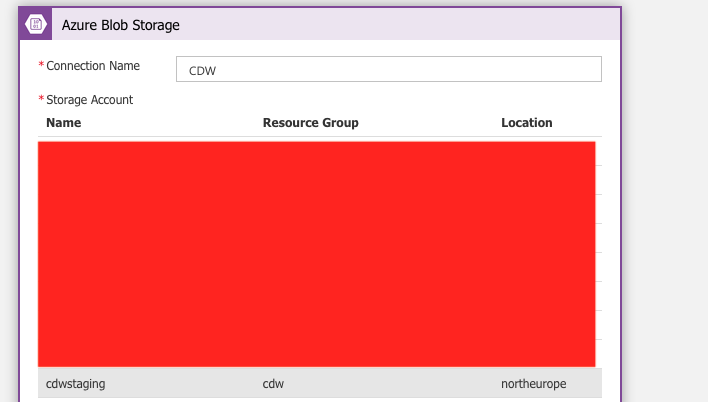 and after scrolling through all the storage accounts within your subscription (boo, we need to have a filter in that screen) you can finally click on your account of choice and after assigning the name for the connection you should see a similar kind of screen for a successful connection as on the picture below:
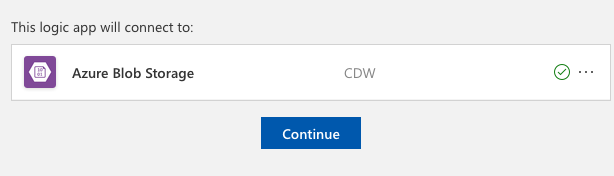 This merely means that the connection was established with the success. Within the same subscription (and yes, I would have loved to have other options as well) you can easily access your Azure Blog Storage accounts, given of course, that your current permission level will allow you to execute this task accessing the storage account with pretty much every possible permission.
Logic App Designer
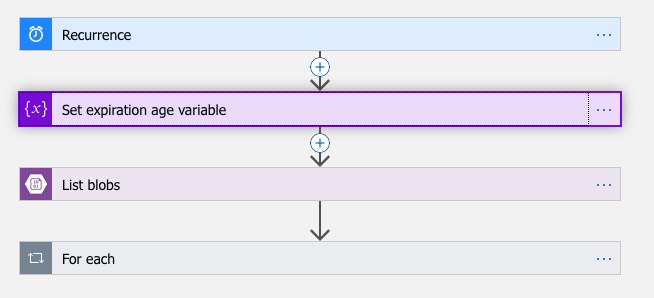 The image of the overview of the prepared logic of the application can be seen on the image to the left of this text. If you have ever used SSIS (Integration Services) or ADF or any other similar flow control mechanism, you should feel yourself pretty much at home with the presented options – which there are 4 to be more precise.
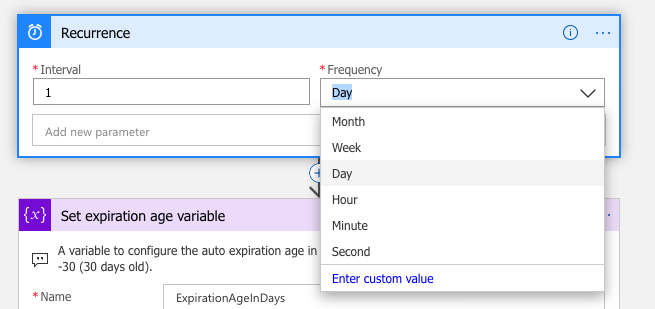 Setting app the trigger recurrence for a simple option is something of a primitive task. Pick your interval (numeric) and the frequency – Second, Minute, Hour, Day, Week or Month. Sounds very clear, right? Removing the old backup is something that I like to configure as a daily task, since 1 week for certain clients might seem like an eternity and in the case of Azure Blob Storage, you are still paying the occupied space in the mean time. I won’t even dive into parameters, but be sure to explore them if you have a need to setup something truly exotic.
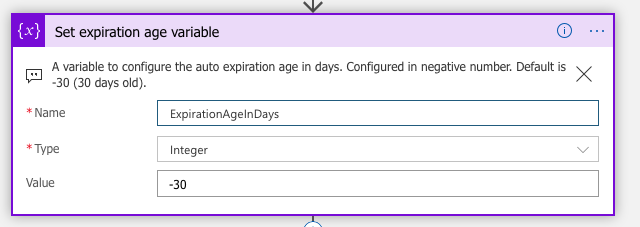 The expiration age is rather simple parameter where you can choose the name, the frequency type (numeric in our case, but you can go for other scenarios with boolean, float, string, array or objects), define the value – I want to keep just 30 days and here you go.
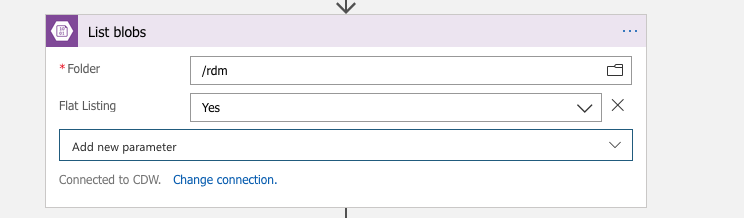 The list blobs section will allow you to select the folder that you want to process (for example if you are using multiple server backups on one storage account within a folder) and just say yes to the flat listing, unless you really know what you are doing and ready to face the alternatives :)
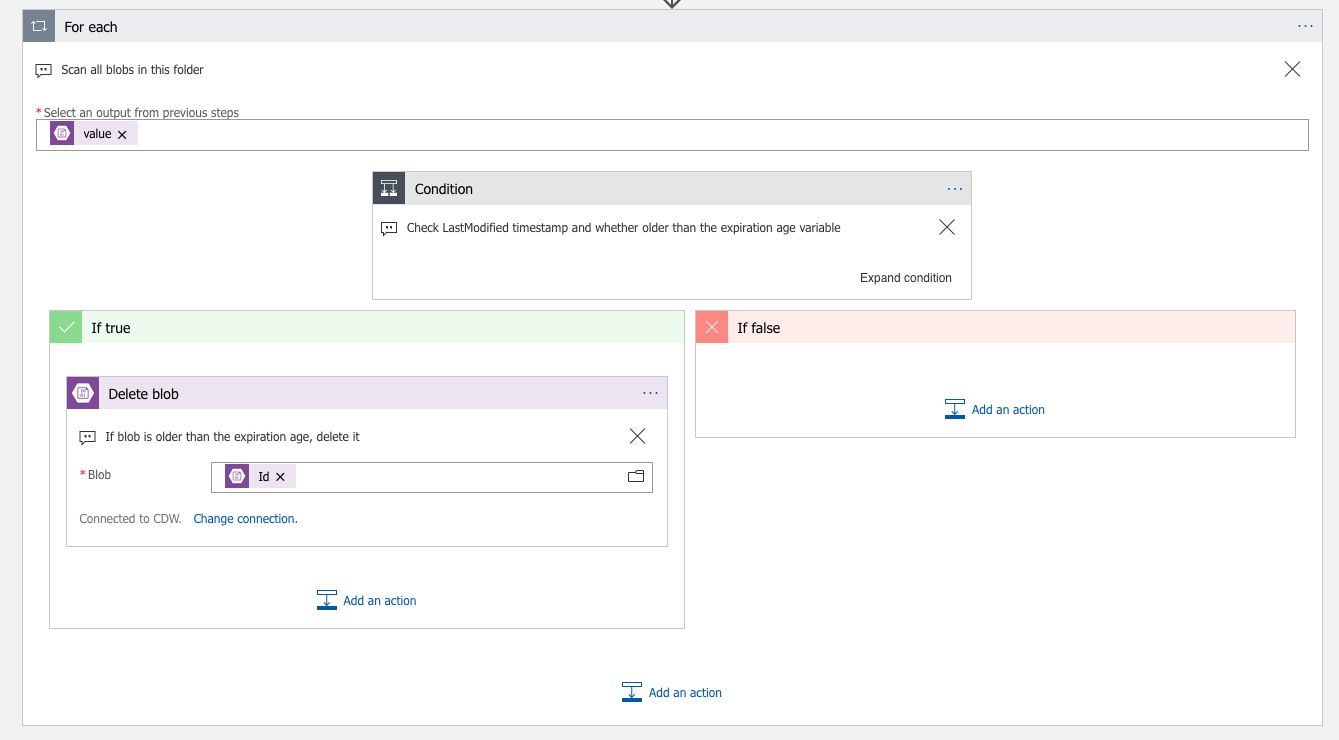 ForEach is nothing but the regular loop (think any programming language such as C# or Java or the same good old friend for SSIS users), where we shall configure the selection of each of the listed in the previous step blob files, and follow with the action of deleting a corresponding file or simply carry on to the next file.
 The Condition screen allows you to set up/control the exact condition(s) for the identification of the action on the file within Blob Storage and here you can either accept the defaults (which are defined with the usage of the ticks applied to both variables/parameters – files LastModified and the calculated ExpirationAge). Clicking on both of them will allow the script customisation or naturally you can go into advanced mode where you can program as much as you can & wish.
![]()
Now all you need is to save the configuration and off we go – start debugging and running your app.
It might look like a heck of a tasks when reading the blog, but in the reality it won’t take you 10 minutes to set up.
Azure Blob Storage Lifecycle Management
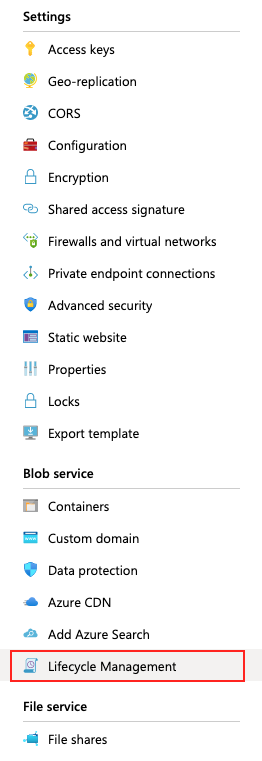 Lifecycle Management is just another blade for the Azure Blob Storage and this is one more recent ones – appearing in the public preview in July of 2018 (less then 2 years ago). This option allows you to manage the blobs by either moving them to a different tier of storage or even removing them – thus doing the necessary job of cleaning up the backups, if we choose to do that. A very easily configurable option
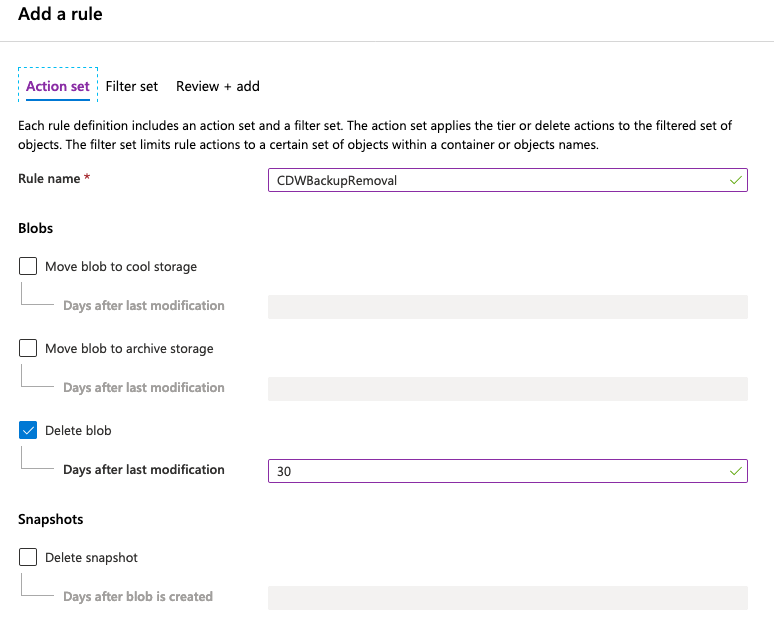 After selecting the blade in the Portal you can add a new Lifecycle Management rule, specifying exact option – if you want to move the affected files to the Archive or Cool storage or to delete it at all (this is what this blog is all about), specifying the number of days after last modification (I wish we could even go more granular in some cases).
Notice that you can have many and not just 1 rule, thus enabling you to generate a necessary policy for each of the containers…
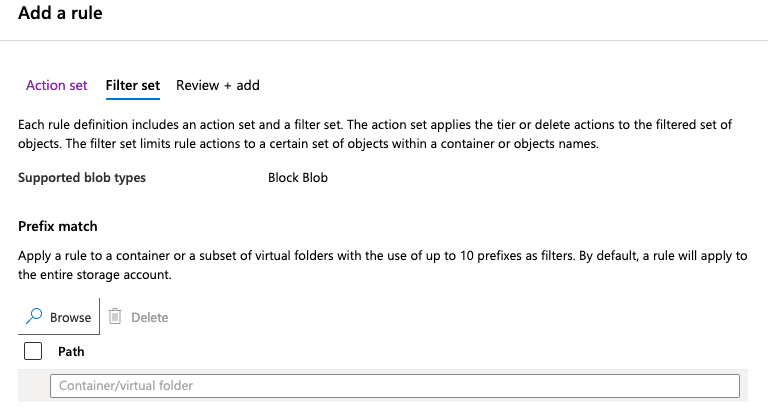 At the Filter Set tab we can decide if we want to apply this rule to the whole container or to some specific folders. A very important note that is specified at the screen is that only the Block Blob files are supported, meaning that any SQL Server 2012/2014, which are confined to the Page Blob usage won’t be supported and that’s a pretty serious disappointment in my eyes. In just a couple of years, it might become irrelevant, but right now a lot of clients are still running those versions in production environments.
Also being unable to filter out the specific filenames/extension might become showstopper in some situations.
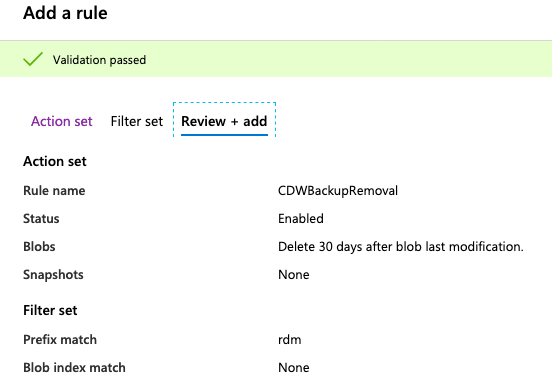 You can review the selected options before applying the rule.
I love this functionality, but I wish it to have a couple more options, such as filename/extension filter, some more extensibility and scripting support – so that I can create a more universal usage across my current clients.
What is remarkable is that AWS S3 has this capacity by default for many many years, and I truly wish that there will be some more modifications and improvements for this much needed feature.
Final Thoughts
A lot of great ways to keep you Backups clean on the Azure Blob Storage, but it will also create some significant problems, if in your organisation every single application will use a different path. Within an enterprise, there must be a declared choice which everyone must be respecting.
One small problem of the Azure Blob Storage Lifecycle Management and Logic Apps methods is that they are based on the LastModified value, which in the case of the restore will be updated with the current date, instead of using the real timestamp within a file name.
You can reprogram the logic within the Logic Apps though, but I hope and expect that Azure Blob Storage Lifecycle Management will get some improvements in the next times, allowing us eventually to select a different property of the file to base our action on.
Thanks for sharing! Valuable information!
.net core 3.1 (vb.net … sorry I am a dinosaur :)
Needs nuget Azure.storage.blobs (v12)
I run the exe as part of my sql maintainence plan.
Hope it helps
Jim
——————————————————–
Imports System
Imports Azure.Storage.Blobs
Imports Azure.Storage.Blobs.Models
Imports System.IO
Imports System.Threading.Tasks
Module Program
‘#//Blob Storage Variables – I am keeping .bak for 30Days and .log for 15Days – Modify as you see fit
Dim BkpDays As Integer = -30
Dim LogDays As Integer = -15
Dim StorageAcct As String = “YourStorageAccountNameHere”
Dim Container As String = “YourContainerNameHere”
Dim Key As String = “YourAccountKeyHere”
Sub Main(args As String())
Dim Cstring As String = “DefaultEndpointsProtocol=https;AccountName=” & StorageAcct & “;AccountKey=” & Key & “;EndpointSuffix=core.windows.net”
Dim ABServiceClient As BlobServiceClient = New BlobServiceClient(Cstring)
Dim ContainerClient As BlobContainerClient = ABServiceClient.GetBlobContainerClient(Container)
For Each item As BlobItem In containerclient.GetBlobs
Dim type As String = Right(item.Name, 4)
Select Case type
Case “.bak”
If item.Properties.LastModified <= Now.AddDays(BkpDays) Then
containerclient.DeleteBlob(item.Name, DeleteSnapshotsOption.IncludeSnapshots)
Console.WriteLine("Item: " & item.Name & " – Purged")
Else
Console.WriteLine("Item: " & item.Name & " – Ignored")
End If
Case ".log"
If item.Properties.LastModified <= Now.AddDays(LogDays) Then
containerclient.DeleteBlob(item.Name, DeleteSnapshotsOption.IncludeSnapshots)
Console.WriteLine("Item: " & item.Name & " – Purged")
Else
Console.WriteLine("Item: " & item.Name & " – Ignored")
End If
End Select
Next
End Sub
End Module
—————————————————————–